
I went on a house tour a few weeks ago in Mount Maunganui run by NZ House and Garden magazine and saw some incredibly stunning and mostly huge homes. I always like looking at the practical spaces in a home such as the pantry, laundry, mudroom type space if they have one, office type space etc. To me those spaces are as important as the big kitchens, bedrooms and living rooms because they are the spaces that actually make home life easier and way more functional if you are lucky enough to have the room for those spaces. I noticed that quite a few of the laundries were quite small compared to the size of the homes, some even without any space to fold washing which I thought was interesting as most of the home owners had kids which generally means lots of washing! When we did our reno I spent heaps of time planning out our new laundry as I think this is a space that can make a world of difference to busy mums and dads if it is done right. I didn't have a huge space to work with but as long as I could fit the ironing board up all the time it was big enough for me! I managed it only just but it is so good not having to get out the ironing board and set it up every time we need it. As you can see from our ironing pile on the bench I'm not very good at tackling the ironing pile so we need it there each morning to do the work shirt/work clothes for the day!
This was my list of 'must haves' for our new laundry (now about 3 years old as we did our reno in 2014)
*space for washing machine and dryer (I wanted the dryer on the floor not wall mounted)
*tub
*space for ironing board
*hanging rail for work shirts to be ironed
*pull out drawer with laundry basket
*space for vertical freezer
*place for mop, broom, brush and shovel (vacuum cleaner lives under the stairs)
*space for togs and beach towels
We had a great cabinet maker who did our laundry shelving and bench top, my craft room bench, our wardrobes and book shelves and cupboards in our new lounge.


Our laundry is right next to our 'mudroom' space which then leads outside via the back door.


The whole space is roughly 2.2 x 3.1 metres. Paint colour is Resene Mint Tulip which we also used for half of Stella's bedroom upstairs. In this much smaller space the colour is very intense (it seems way lighter in Stella's room) so I would go half strength if I was doing this again. Smaller spaces intensify colour! The floor is a vinyl that I liked in the shop but not so much in here- think it's just a bit dark for the colour of the walls. It's very practical though and doesn't show the dirt too much :)

I went with open shelving as I like seeing everything and being able to grab things easily. I probably should have put doors on the beach towels cupboard though but it doesn't bother me too much!


On the shelves about the washing machine I've got containers for washing power and napisan, laundry liquids, cleaning stuff, shoe polish etc

I keep a pair of scissors and a laundry marker for new clothes- scissors to cut off tags and pen right there makes it a bit easier to remember to name the kids clothes.

Orphan sock container...where do they go?!

This is one on my fave things in my laundry- I bought it years ago from one of those Home Catalogues that appear in your letter box now and then. It is so handy for when it's raining and I've just done a small load of washing, or for drying things flat or for things I can't put in the dryer if I'm using that after days of rain! Between this and the peg organiser thing below I can nearly hang a whole load of washing in here if it's raining. I got the peg organiser from Payless Plastics.


Tog bags and beach bag hang on the door but could probably be moved to the mudroom! Funny how you just get used to things being in a certain spot.

Ironing pile on the bench (always there to some degree)... the washing basket to take the washing outside usually sits on the bench too or rests on the sink to give me more bench space.

Under the sink I've got a bucket for togs. Make your cupboards as big as you can- you'll always use the extra space for something!
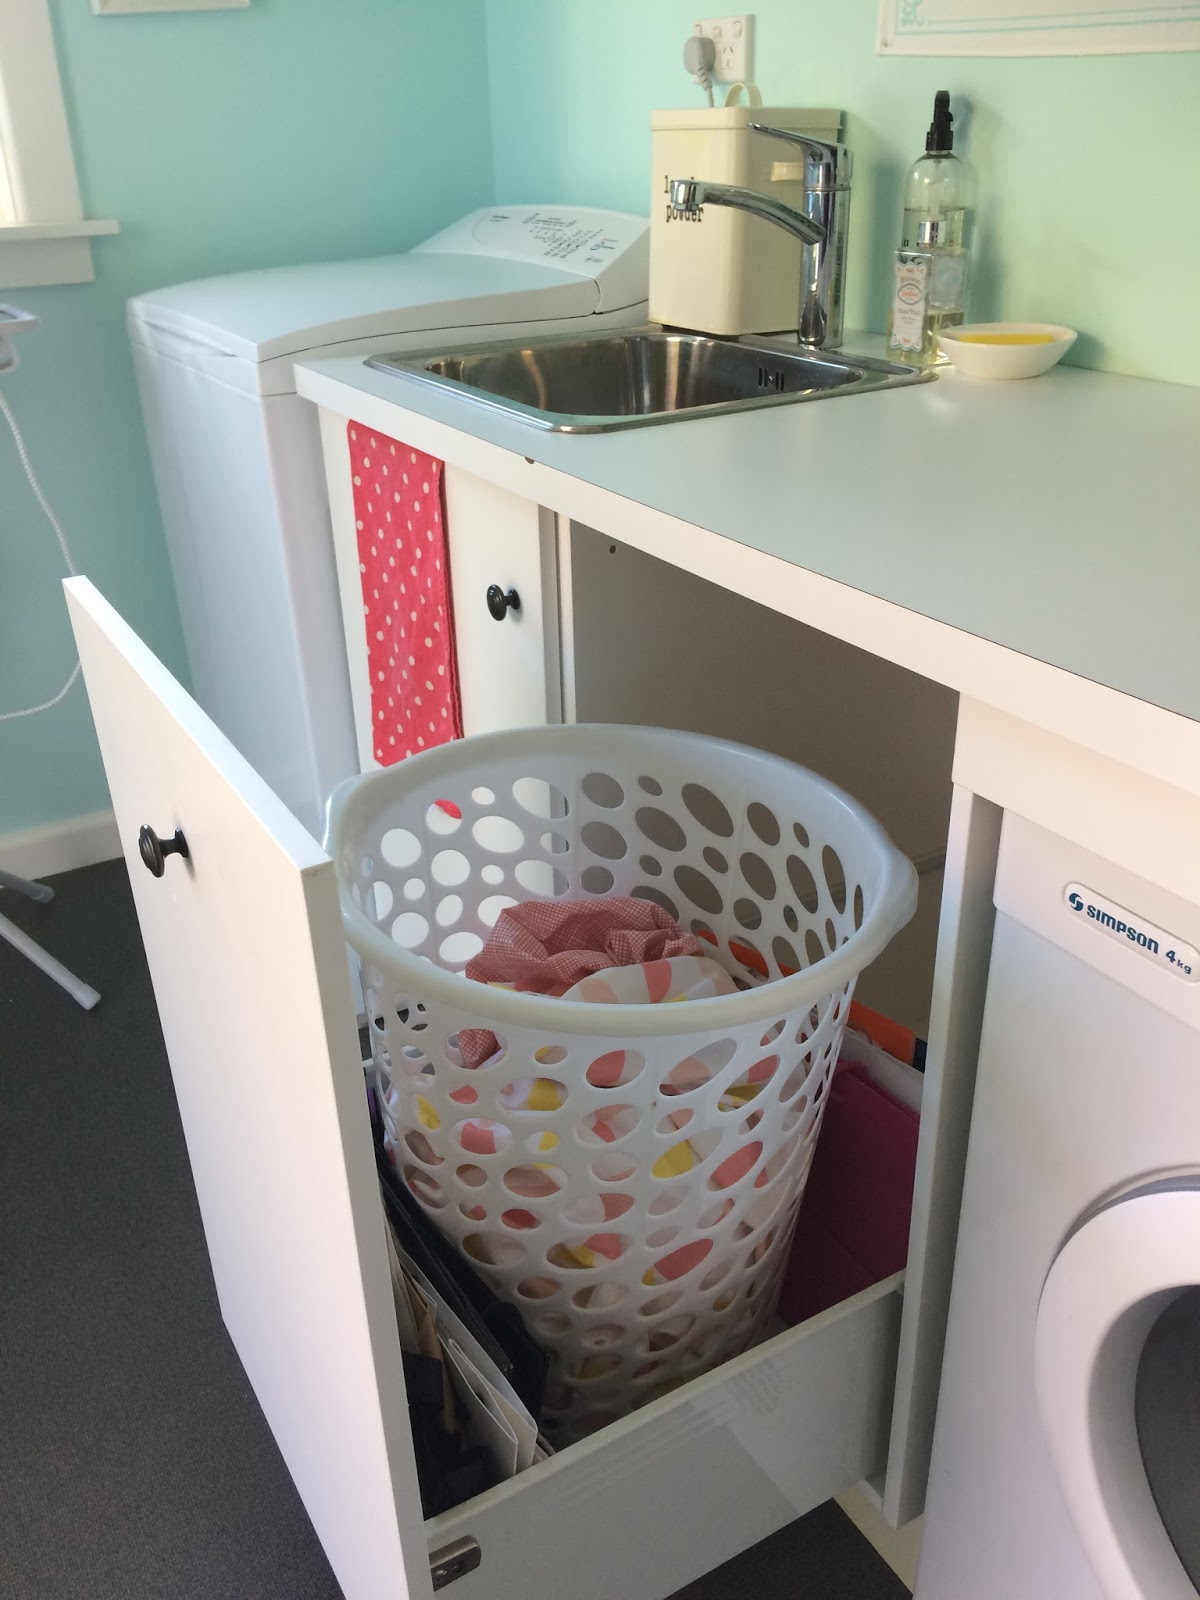
This is just a pull out draw with a large front on it for the washing basket- I bought the washing basket from The Warehouse I think and it just sits in there. I wanted to have 2 washing baskets, one for most of the washing and one for whites, knits etc but it's actually been fine just having the one. We have a laundry basket in our bathroom and the kids bathroom as well.

One thing I'd recommend is being really clear about what you are wanting for each aspect of your laundry (or any room in your reno/new build). My craft room bench has a round edge (i.e. no black 'seam' like the bench I ended up with in our laundry) and I was pretty sure I'd said I wanted the same for the laundry. However somehow the cabinet maker (who was awesome at everything else) forgot this and put this bench in instead, and because I was out and it was already in when I saw it and he said he'd give it to me for cheaper than what I would have paid for the rounded edge bench top I just let it go. Then about a month later this bit was chipped off somehow and I wished I'd held my ground and got the round edge because now we're going to have to replace the bench top someday! Just a tip to stick with what you want because it's you that ends up having to sort out these sorts of things well after the tradie as left!

The bench isn't huge but it's big enough to sort and fold one or two loads of washing.
So there you go...some ideas if you are planning a new house build or wanting to do a laundry reno. I love our laundry and it works really well for our family of 5.
I have some more laundry ideas on my pinterest page here
Thanks for reading :)
Megan
PS: I've started instagramming again if you want to check out my pics https://www.instagram.com/meganmousehouse/