
My pin cushion- one of the first things I made last year
One of the first crafty swaps I took part in was a pin cushion swap hosted by Kate at Fox's Lane (Kate is an incredibly talented crafter and is on a fantastic journey around Australia with her family in a renovated caravan- you can check out her crafting and adventures here). I made this pin cushion for the swap after googling 'pin cushion tutorial'. Unfortunately the tutorial is no longer there so it sometimes pays to print out a tutorial if you really love it!

How to sew a pin cushion
 You will need


- sewing machine
- sharp scissors- I use Korbond scissors from the supermarket for all my crafting
- fabric - you could use the same for the front and the back pieces or two different fabrics
- piece of card for the template
- stuffing- a huge bag of this is about $7 from craft stores- mine has lasted about a year!
- needle and thread
Instructions
1. I use cardboard templates for a lot of my projects. Cut out a piece of cardboard the size you would like your pin cushion to be plus a bit bigger - after sewing, things are always a bit smaller as you have to leave room for the seams. I didn't measure my template for this pin cushion but the measurements are 18 cm wide by 11 cm high.
Draw around the template on your front and back pieces of fabric and cut them out.


2. Place right sides together and sew around the outside about 1cm from the edge of the fabrics. Start in the middle of one of the longer sides - roughly where the purple dot down the bottom on the left is in the pic below. Sew around and stop when you get to roughly where the other purple dot is- this leaves you a gap to stuff the pin cushion. Don't leave your gap too small or you'll find it tricky to turn your pin cushion right sides out and stuff if the gap is too small.
Clip across the four corners, taking care not to cut your stitching. You do this so that when you turn your pin cushion right sides out you will have nice sharp corners.

3. Turn your pin cushion right sides out by pushing your fabric through the gap. You can then use a chop stick to push out the four corners if needed.

4. Stuff your pin cushion quite firmly. Use a needle and thread and hand stitch the gap closed.

Finished!

Now for the 'extra for experts' one... with no measuring!

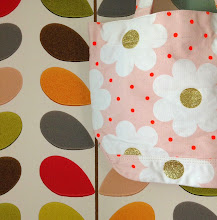
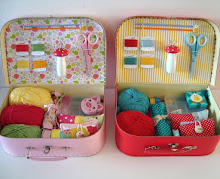
1. Use the same template and cut out a piece of fabric for the back of your pin cushion. Choose two fabrics for the front of your pin cushion (the sewing notions fabric is from here)- use the template and cut out your two pieces but make one a bit shorter than the template and the other one a bit shorter still- see pic below. So both pieces are the same height as the template but shorter widths. Cut a piece of ribbon the same height as the template.

2. Place the two pieces right sides together and line them up along one edge. Sew 1 cm in from the edge to join the two fabrics together. Open up your seam on the back and iron flat like this. Now you can do patchwork!

3. Lay your back piece on top of your patchworked front piece. You can see where I needed to trim the patchworked piece to make it the same size as the back piece.

4. Trim off the edges so both pieces are now the same size. If you used measurements to follow a pattern like this you wouldn't need to do the trimming but this way is a lot quicker I think!

5. Place your ribbon along the seam and sew onto your fabric

6. Place your two pieces right sides together and sew around just like the first pin cushion. Clip the corners.

7. Turn right sides out, stuff and hand stitch gap closed. Finished!

8. Now for an extra -extra for experts... you could make a little needle book to go with your pin cushion! I will write a little tutorial to make one of these too as I just made it up using my pin cushion template but if you want to make one now try googling 'needle book tutorial'.


Would love to hear if you have made your own pin cushion or if you have any questions. Feel a bit nervous writing a proper sewing tutorial! Post a pic of your pin cushion to my mousehouse facebook page if you would like to- would love to see them!
Happy sewing!
Megan x
And thank you for the comments on my dolls house lights- I'll draw the winner of the book tomorrow :)


8 comments:
I've never made a pin cushion! I might just pop this on to my pintrest page so I can do it sometime. Thanks.
I loved all the pincushions in that swap, which was my first too! Must make another from your pattern, you can never have too many :-)
Thank you so much for the tutorial! This is just the project I need to make me dust off my sewing machine. I hope you're having a fabulous week. We've just had a crazy hail storm here and everything was totally white! Beautiful but so slippery on the school run!!
Awesome tutorial Megan, thanks so much for that. Did you know that you can get emery sand to fill your pincushion with instead of using Dacron? It's a very Victorian thing, but it's great for keeping pins and needles sharp and it also cleans them when then are inserted into the cushion keeping rust away or taking off sticky starch or such thing. Just something I thought you might like. :) Belinda
That is so cute... I love the fabrics.
Love how you have used your fabric for the pincushion and needle case. Is it alright to post the photos in the gallery of my store and blog linking to your blog?
lovely
please tell where you got the needlebook fabric from with the notions on ?
Thanks
Hi, the notions fabric is from here...
http://www.stitchbirdfabrics.co.nz/products/?product_id=446
Post a Comment